
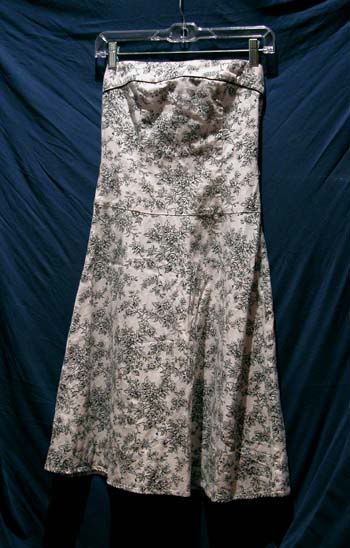
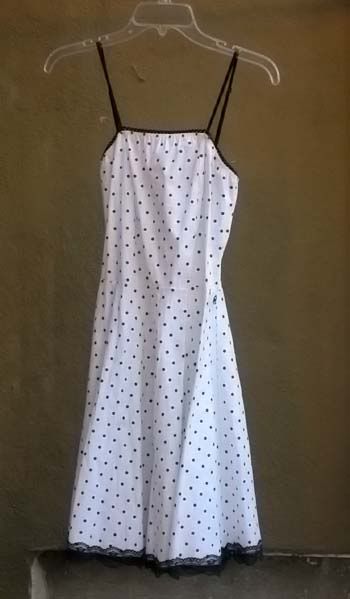
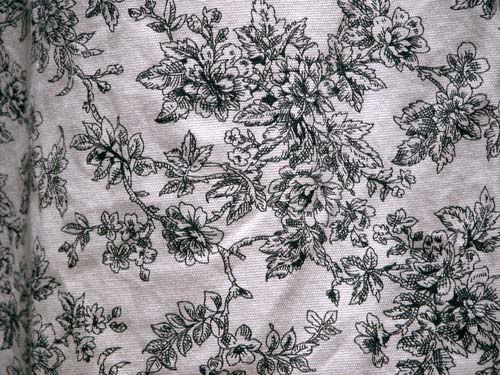
I had no plans to potentially ruin anything quite so precious as a wedding dress (also, I don't have one), but I did have two second-hand dresses in my closet that I probably would never wear if they remained white. The first dress was a strapless black and white cotton toile, and the second was black dots on white. Because I took a few pictures of both dresses in the dyeing process, so excuse me if there is a mix of both dyeing adventures here. This is how both dresses started:
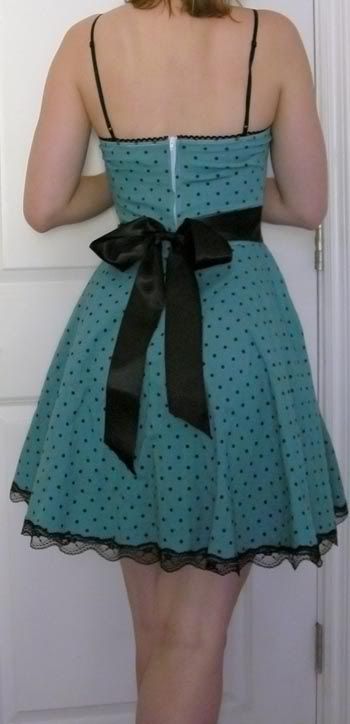
My goal was to turn the white toile dress dark pink/maroon and to turn the polka dot dress teal. The maroon dye was a mix of Rit's Wine and Black colors. Rit makes a pre-mixed teal color, so I left it as is.
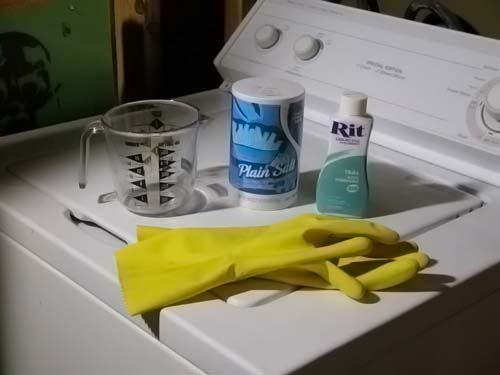
I used Rit dye because it is the easiest to get ahold of and it seemed to be the easiest to use. I used the liquid form of the dye, which seemed to be easier yet than Rit powder. While I used Young House Love for bravery and inspiration, my true guide was Rit's website.
I decided to use Rit's Washing Machine dyeing technique because it doesn't involve standing over the sink or a pot on the stove stirring for half an hour. The washing machine's agitator does the work for you. I also followed the instructions on the bottle, and if there was ever conflict I followed the washing machine instructions from Rit's site. (By the way, I have no idea if this dye method works in front-loading washers.)
The first step is to soak the fabric thoroughly it hot water. I did this in my kitchen sink. This opens up the fibers of the fabric and gets it ready to accept the dye.
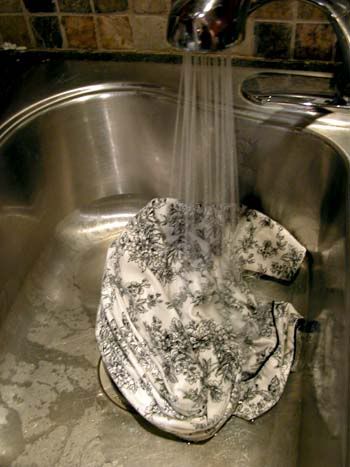
You definitely want rubber gloves throughout the whole dye process.
I set my washing machine for a small load on hot and added the dye and salt to the water. The required dye amounts are based on a dye-to-water ratio, it might be helpful if you can find out how many gallons your washer uses on a given setting. I couldn't find this info for my washer (because it is super old), so I sort of guessed it was around 5-6 gallons and eyeballed it. The instructions on Rit's site also have a handy chart for getting this right.
Once the agitation cycle started, I dropped in the wet dress. I left the door of my washer open to take a photo of the dye mixture, but once the agitation starts you should close it to keep dye from spraying all over your laundry area and you!

The standard agitation cycle on my washer is about 20 minutes, so I only had to set the dial back once to achieve the full 30 minutes of soaking required.
Rit's instructions are a little regarding the rinsing stage. They don't specify whether you can use the rinse cycle on the machine to rinse the fabric, so I decided not to risk it and rinsed the dress out by hand. This was probably the most labor intensive part of the whole process. It can take a while for the water to run clear, but keep at it. The more dye you get out by hand, the less likely it is to transfer to other clothes when it goes through the wash.
While I was rinsing the dye out of the dress I let the washing machine complete it's cycle and drain away the rest of the dye. Rit recommends running your machine empty with bleach and detergent after you use it for dyeing, and I really recommend this. Better safe than have a load of color stained clothes next time you do laundry!
I also ran the dresses through the washing machine alone once as well. Rit's instructions say you can let the dyed cloth air dry or put in in the clothes dryer. I threw mine in the dryer because I was just way too impatient to find out how the colors turned out.
You can see how the polka dot dress turned out in my post about How to Finish Ribbon Ends, but I'll post the photo again here. It turned out a little darker that I wanted, but I still love the color.
The toile dress turned out exactly how I wanted it to. I paired it with a vintage pink petticoat, some black ribbon for my waist, and wore it to my friends Lindsay and Mike's wedding! I'll update with a photo soon.
Dyeing clothes is not as scary as I thought it would be, but it does require time and attention. Things definitely won't turn out the way you want them to if you cut corners. In the end I have two awesome "new" dresses in colors I'll actually wear.
No comments:
Post a Comment